Showing posts with label Guest Posts. Show all posts

Wednesday, 6 May 2015

Ginny’s raspberry coconut cupcakes

Ginny is one of the very generous ladies who is raising money for Breast Cancer Network Australia by undertaking a 350km bike journey in October from Vietnam to Cambodia. 

She is "half the reason" we organised a "pink" themed cake-up in April. You would have seen all the pretty photos from our cake-up (in case you missed them, you can see them all here) so of course, it's time for the recipes! 

These are Ginny's raspberry coconut cupcakes and aren't they so photogenic?


Recipe from here.

Ingredients
  • 175g self-raising flour
  • 140g caster sugar
  • 50g desiccated coconut
  • 140g butter, softened
  • ½ tsp vanilla extract
  • 2 large eggs
  • 4 tbsp milk
  • 140g raspberries, fresh or frozen

    For the frosting
  • 280g icing sugar
  • 85g butter, softened
  • 4 tbsp raspberry coulis, from a bottle or fresh
  • a little desiccated or shredded coconut, to decorate

Method

  • Heat oven to 190C/170C fan/gas 5. 
  • Line a 12-hole muffin tin with deep paper cases or a 15-hole bun tin with cake cases. 
  • Tip all the cake ingredients except the raspberries into a bowl and beat for 1-2 mins until light and fluffy. 
  • Gently fold in the raspberries.
  • Divide the mixture between the cases and bake for 18-20 mins (add a couple of extra mins for deep cases), until golden brown and firm to the touch. Leave to cool.
  • Beat together the icing sugar, butter and raspberry coulis to make a light, fluffy icing. Spoon or pipe onto the cakes and sprinkle with coconut.

Thursday, 20 November 2014

Guest post: Linda's pandamingtons

There are still plenty of people unfamiliar with Asian desserts but most would have come across the distinct flavour of pandan at some point (whether they know it or not). It goes incredibly well with coconut and in curries and the bright green colour makes it fun to eat and a delight to the eyes. For those unfamiliar, pandan or pandanus is a subtropical plant used to flavour both sweet and savoury Asian dishes and is commonly found in Malaysian and Singaporean cuisine. The leaves themselves are usually fairly easy to obtain from your local Asian grocer but for this recipe you will need pandan essence (equally as easy to find, if not more so). 

This slightly modified recipe is from my good friend Vi who is a bit of a whizz in the kitchen – thanks Vi! You can also omit the ‘lamington’ stage of this recipe and have yourself a chiffon cake!


Pandamingtons 

Ingredients:

- 1 cup self-raising flour
- ¾ tsp baking power
- ¾ tsp cream of tartar
- 1 ½ tsp of pandan essence (from any Asian grocery)
- ¾ cup castor sugar
- 50ml vegetable oil 
- 8 eggs separated 

Method:

1. Pre-heat oven 170 - 180 degrees fan-forced.
2. Sift flour and baking powder together and set aside .
3. Whisk egg whites to soft peaks and gradually add cream of tartar and half of the castor sugar. Beat until egg whites are stiff and glossy.
4. Beat the egg yolks with remaining sugar and gradually pour in oil until egg yolks are look light and creamy. Add pandan essence to egg yolk mix and stir until colour is even.
5. Add sifted flour and baking powder to the egg yolk mixture until well combined.
6. Gradually fold in egg whites into your green mixture (egg yolk and flour mixture). Start with a small amount of egg white mixture and combine well, then carefully fold in the rest until just combined.
7. Distribute the mixture into two brownie trays (or a bunt tin for chiffon cake). Make sure the tins are well greased and lined or the cake will stick. Bake in oven 170-180 degrees until cake springs to touch and the top starts to brown (about 20-25 mins)
8. Take cakes out of tins carefully and allow to cool
9. For lamingtons: Melt 600g white chocolate with 300ml of cream over a double boiler or a glass bowl over a saucepan of water (make the water doesn’t touch the bowl). Once it is all melted, add a few drops of the pandan essence (depending on how green you want it to look).
10. Cut the cooled cake into neat squares. Dip cakes in melted chocolate using a fork or skewer and roll in desiccated coconut.

Thursday, 11 September 2014

Guest Post: Hazel's Croissants

We all know croissants are famously enjoyed with a capuccino in some famous Piazza of a famous European city and we definitely all know how difficult they are to make. So when Hazel walked in holding a tray full of them at our August Cake Up, all eyes immediately turned on her. 

With our September Cake Up just around the corner (tickets available here) we are sure you are all thinking about what savoury goodness you will be sampling on Saturday, but for those still in the August headspace you will be glad to know Hazel has generously shared the recipe for her delicious croissants with all of us!

Thanks Hazel!


Croissants

Ingredients
-2 cups unsalted butter, softened
-2/3 cup unbleached bread flour (or all purpose flour)
-2 1/2 cups milk
-1/2 cup white sugar
-2 tsp salt
-4 1/2 tsp active dry yeast
-8 cups all purpose flour
-2 eggs (Hazel accidentally used 3)
-Jam of your choice


Procedure
1) In a medium bowl, cream together the butter and 2/3 cup of flour. Divide into 2 equal parts, and roll each half between 2 pieces of waxed paper into a 6 x12 inch sheet. Refrigerate.
2) In a large bowl, mix together the dry yeast and 3 cups of the remaining flour. In a small saucepan over medium heat, combine the milk, sugar and salt. Heat to 115 degrees F (43 degrees C), or just warm, but not hot to the touch. Mix the warm milk mixture into the flour and yeast along with the eggs, and lemon and almond extracts. Stir for 3 minutes. Knead in the remaining flour 1/2 cup at a time until the dough is firm and pliable. Set aside to rest until double in size.
3) Cut the dough in half, and roll each half out to a 14 inch square. Place one sheet of the cold butter onto each piece of dough, and fold the dough over it like the cover of a book. Seal edges by pressing with fingers. Roll each piece out to a 20x 12 inch rectangle, then fold into thirds by folding the long sides in over the center. Repeat rolling into a large rectangle, and folding into thirds. Wrap in plastic and refrigerate for at least 30 minutes.
4) Remove from the refrigerator one at a time, and roll and fold each piece two more times. Return to the refrigerator to chill again before shaping. If the butter gets too warm, the dough will become difficult to manage.
5) To make the croissants Hazel has provided some tips below (in the notes section) but she recommends watching a video on how to roll them properly. 
6) Place some jam of your choice in the middle before rolling them. 
6) Place croissants on an ungreased baking sheet, and let rise until doubled. 
7) Preheat the oven to 220 degrees C. Croissants can be brushed with egg white for a shiny finish.
6) Bake for 8 to 10 minutes in the preheated oven, or until the bottoms are golden brown.

Hazel's notes: 
Its actually a danish pastry but when I made them the first time they tasted exactly like croissants so I rolled the dough into a rectangle cut into triangles, rolled the triangle out into an isosceles triangle and added the jam before rolling it up from the base of the triangle. I put a little jam under the tip to hold it down too. Would be useful for people to watch a youtube on rolling croissants before the rolling stage.

Apparently the dough can be made a week ahead and stored in the fridge or a month in the freezer before shaping, rising and baking.

Start to finish the process does take a good few hours, but most of that time us waiting for risining or chilling so just pick a day you will be hanging around the house doing other things. Trust me the time and effort is worth the wait. With the size I made at cake up the whole batch if dough made 42 croissants.


Thursday, 17 July 2014

Guest Post: Bec's Carrot Cupcakes

As most of you know, Canberra Cake Club had a cake stall at The Forage Event on the 5th of July in New Acton, organised by the lovely Belinda. We were extremely lucky to have a bunch of our regular cake clubbers bake all sorts of deliciousness for us and we are extremely grateful for all the time and effort they put into their baked goodies. 


A special thanks has to go to Bec (Sweet Tea) as well, most of you will know her - she is the amazing friend who always provides cake stands and accessories for our cakeups and since our Forage cake stall we have dubbed her our "cake stylist" as her magic hands are capable of making everything look gorgeous! As if helping us man the stall wasn't enough, she baked as well - and her carrot cupcakes were definitely enjoyed by many! Thanks so much Bec, you are truly a superstar! Check out her pretty website and innovative business - high tea hire!


Here is my recipe for the Carrot cupcakes which were a part of the Canberra Cake Club's Forage cake 
stall. These were one of many delicious treats on display, looking beautiful of course on Sweet Tea's delicate tired stands and beautiful milk glass pastel cake stands. 
Thanks Canberra Cake Club for having me along for the day, it was great fun even if a teeny bit cold and the fact I got to taste test some pretty delicious treats made it an extra tasty afternoon. 

What you need:
  • 1 cup vegetable oil
  • 1 1/3 cups firmly packed brown sugar
  • 3 eggs
  • 3 cups firmly packed, coarsely grated carrot
  • 1 cup coarsely chopped walnuts
  • 2 1/2 cups self raising flour
  • 1/2 tsp bicarbonate of soda
  • 2 tsp mixed spice
Lemon cream cheese frosting
  • 30g butter, softened
  • 80g cream cheese, softened
  • 1 tsp finely grated lemon rind
  • 1 1/2 cups icing sugar mixture
What you do:
  1. Preheat oven to moderate. Line 12 hole cup cake pan with paper cup cake cases.
  2. Beat oil, sugar and eggs in small bowl with electric mixer until thick and creamy.
  3. Transfer mixture to large bowl, using wooden spoon, stir in carrot and nuts then sifted dry ingredients. Distribute mixture between holes of prepared pan.
  4. Bake in moderate oven about 30 minutes or until . Stand cup cakes in pan 5 minutes before turning onto wire rack.
  5. Spread cold cup cakes with lemon cream cheese frosting.

Lemon Cream Cheese Frosting: Beat butter, cream cheese and rind in small bowl with electric mixer until light and fluffy, gradually beat in icing sugar.

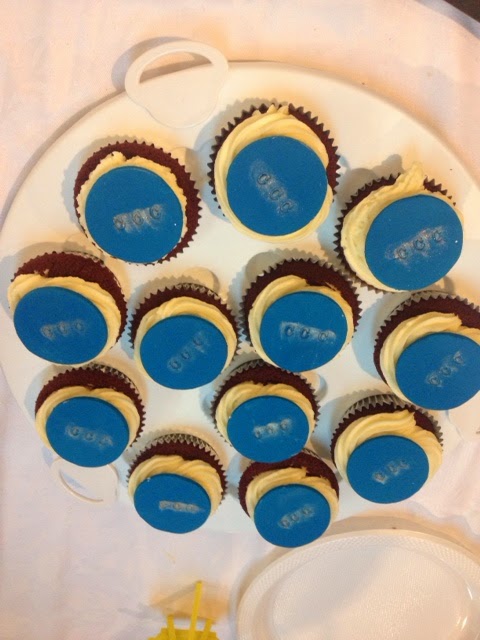
And if you want even more cupcakes, check out these gorgeous Red Velvet Cupcakes that the lovely Katina made and personalised for us! The recipe is featured in our previous guest post! What amazing people we have in Canberra Cake Club huh?


Friday, 20 June 2014

Guest Post: Katina's Red Velvet Cupcakes (hundreds of them)

Katina  is definitely the creative one. She is the genius who baked a Canberra inspired cake for our cakeup at Essential Ingredient and really impressed us all with potato as her secret ingredient! 


So when Katina mentioned she had baked 100+ cupcakes for her brother's wedding we knew it would have most definitely been a success. So much so that we tested our luck by asking her to bake some for the Forage Event! How lucky are we? 

Not only has Katina so kindly donated the winning recipe she used to make the 100+ cupcakes, she will be baking them for our Forage Event on the 5th of July in New Acton. Need any more convincing to come and pay us a visit? For more details on the Forage Event visit www.theforage.com.au. Thanks Katina!


"Is there anyone here because they're going to make a wedding cake?" the cake decorating teacher asked. Apparently there is usually at least one in each of her CIT courses. My goodness, I thought, why would anyone agree to do that?

Fast forward a few years and my brother asked if I would consider doing the cake for his wedding, at that point 10 months away. It would just be one tier, he promised, with cupcakes. Red velvet cupcakes. One hundred red velvet cupcakes. I agreed and spent the remainder of the year baking (nearly) monthly decorated cakes for my colleagues to practice those ganaching and fondant skills. The cupcakes would be fine as long as I could find a good recipe, I figured.


That proved not as easy as anticipated and I must have visited six different bookshops to find any book with red velvet in it (naturally a week after that hunt Donna Hay magazine put out an edition with eight different red velvet variations...). I made a few practice batches and things were good to go.

The week leading up to the wedding I worked early morning shifts and came home every afternoon to bake two dozen cupcakes which then went into the freezer. My oven only has one tray (no idea why) so this was a fair chunk of time each afternoon. Let me tell you, I was utterly sick of cake batter and red food colouring by the end of the week!

The wedding was wild and rainy and generally terrible for fondant but nearly all the cupcakes disappeared. And almost enough time has passed that I'm now ready to bring out the cake tins and the cocoa and the red food dye once more.

Here's the recipe I used, from The Cupcake (published by LOVE FOOD/Parragon Books).


Red velvet cupakes
Makes about 22 (original recipe is doubled)

280g plain flour
2 tsp bicarbonate of soda
4 tbsp cocoa powder
230g butter, softened (or use margarine in a pinch)
280g caster sugar
2 eggs, lightly beaten
250ml buttermilk
2 tsp vanilla extract
2 tbsp red food colouring

Pre-heat oven to 180C. Put cupcake papers out (or don't – I never do this at the start).
Measure out flour, bicarb soda and cocoa powder all in a bowl together so they're ready to go (the recipe says sift them but really, who has time?). Mix them together a bit.
Beat butter and sugar in another bowl until light and fluffy.
Gradually beat in egg and half the flour mixture (that's why you should mix the dry ingredients up).
Beat in buttermilk, vanilla extract and red food colouring.
Fold in remaining flour and stuff. The mixture doesn't go super runny; it's kind of stiff and keeps its shape when you dollop spoonfuls out.
Spoon mixture into patty cases.
Bake for 15-20 minutes (in my oven 17 minutes was perfect) or until risen and firm to touch. Cool slightly in tins then transfer to wire rack to cool completely.
Best eaten immediately (like any cake!) but keeps okay frozen for about a week-and-a-half.

These guys are awesome with cream cheese icing as follows:
250g full fat cream cheese, softened
150g butter, softened
500g icing sugar

It's important to soften the cream cheese and butter first or else you end up with lumps. Trust me on this. The recipe says to blend together the butter and cream cheese by hand with a spatula but I did it in the electric beater which was much faster. Add in the icing sugar and beat until smooth and creamy.


Wednesday, 11 June 2014

Guest Post: Lisa's gluten free chocolate mousse cake

We knew Lisa would be baking something delicious as soon as she snapped up a spot for our June cakeup. We could sense her excitement all the way from her living room! So when she turned up to V Spot Cafe' we couldn't wait to see her creation and boy was it pretty; two decadent layers of chocolate cake topped with some perfectly crafted chocolate butterflies. And it got even better when we cut through and discovered the soft layer of mousse, so it was no surprise when everyone started asking for the recipe. 

Thank you Lisa for generously providing the recipe for the cake, we are sure it will be appreciated and replicated by many. It was a pleasure having you and look forward to having you at our future events! 


You Made My Day!

First off, I want to say a huge thank you to everyone who baked and participated in the June cake up! You really made my day! I have coeliac disease, which means that a gluten free life is not a lifestyle choice or a fad, but something that I have to follow strictly. Coeliac disease is an autoimmune disease where if I eat even the tiniest bit of gluten my body attacks itself. So when I heard that the June cake up was going to be gluten free I was excited. But when I got to the V Spot and saw all of the amazing cakes that were GF, I was absolutely thrilled! And I was even more impressed when I saw the detail that so many people took when listing their ingredients too. Something as little as using a GF baking powder instead of a non-GF one makes all the difference to a coeliac like me.

I’ve only been diagnosed in the last year after suffering with symptoms for years. And I’ve loved to bake since I was a kid so I was pretty devastated when I received my diagnosis. I thought “All I’ll be able to make is flourless chocolate cake or almond friands.” Wow, was I wrong. I’ve had such a great time over the past year learning how to bake all over again and I’ve discovered so many amazing GF recipes.  Before being diagnosed my signature baked item was chocolate brownies (I’m American by birth) but I have now found a brownie recipe that is GF AND just as good (if not better) than the non-GF one!

My family’s favourite cake at the moment is the one I made for the cake up – Chocolate Mousse Cake. Everyone who has had it can’t believe it is gluten free. So here is the recipe which I got from Gluten Free on a Shoestring which is a brilliant GF blog in the US. I’ve converted all of the measurements to Australian.  It may seem fiddly but it really isn’t once you figure out how to make a cake collar. Enjoy! 

And thank you once again. You really really really did make my day!


Prep time: 20 minutes       Cook time: 30 minutes       Yield: 20cm cake

Ingredients

CAKE
1 cup + 2 tablespoons (158 g) plain gluten free flour
1/2 teaspoon xanthan gum 
55g unsweetened cocoa powder 
3/8 teaspoon salt
3/8 teaspoon baking soda
150 g sugar
1/2 cup + 1 tablespoon (127 g) sour cream, at room temperature
6 tablespoons (84 g) vegetable oil (I used rice bran oil)
1 egg + 1 egg yolk at room temperature, beaten
1/2 cup (120ml) + 1 tablespoon warm water (about 35°C/just about body temperature when you put your wrist under the tap)

CHOCOLATE MOUSSE
20 g unsweetened cocoa powder 
120ml warm water
285g dark chocolate, chopped
56 g unsalted butter, chopped
475ml thickened cream
29 g icing sugar (pure, not icing sugar mixture)

Directions
  • Preheat your oven to 180°C. Grease or butter an 20cm round (or springform) baking pan and set it aside.  I use a springform pan for the entire process but you could use a round pan to bake the cake and then use the springform to attach the collar when you put the mousse on it (see below).
  • Make the cake. In a large bowl, place the flour, xanthan gum, cocoa powder, salt, baking soda and sugar, and whisk to combine well. Create a well in the center of the dry ingredients and add the sour cream, oil, eggs and water, mixing to combine after each addition. The batter should be very thickly pourable. Scrape the batter into the prepared pan, smooth into an even layer and place in the center of the preheated oven. Bake until a toothpick inserted in the center of the cake comes out mostly clean or with a few moist crumbs attached (about 30 minutes). Do not overbake. Remove from the oven and allow to cool for 10 minutes in the pan before inverting onto a wire rack (or open the springform pan) to cool completely.
  • While the cake is cooling, make the chocolate mousse. In a small bowl, whisk the cocoa powder into the warm water until it dissolves completely. Set it aside. In a small, heat-safe bowl, place the chopped chocolate and chopped butter, and place over a small saucepan of simmering water, making sure the bowl does not touch the water. Melt the chocolate and butter over the simmering water, stirring occasionally, until smooth.  Remove the melted chocolate and butter, and whisk the cocoa powder dissolved in water into it until smooth. Set the bowl aside. In the bowl of a stand mixer fitted with the whisk attachment, or in a large bowl with a hand mixer, whip the thickened cream on medium-high speed until soft peaks form. Add the icing sugar, and whip again until stiff, shiny peaks form. Pour the chocolate mixture into the bowl of whipped cream slowly, carefully folding the ingredients together and taking care not to deflate the whipped cream more than necessary. Fold until no white streaks remain.
  • Assemble the cake. To assemble the cake, you will need a springform pan and a 10cm tall acetate cake collar or one fashioned out of aluminum foil, with the inside sprayed with cooking oil to prevent the mousse from sticking to it. I make one out of foil by ripping off a piece long enough to go around the cake and then folding the foil in half longways. Fit your cake collar around the cake, then clip the sides of the springform pan to the base to enclose the cake and collar. Spoon the chocolate mousse onto the enclosed cake, and smooth the top. Refrigerate the cake until the chocolate mousse is set (about 2 hours). Slice and serve chilled.  

Wednesday, 28 May 2014

Guest Post: Belinda from The Forage

Our guest poster from this week is Belinda. Belinda joined us at the Boathouse for our June cakeup and without revealing too much - we might just be organising something a little different for July.....Stay tuned.. 

So, back to Belinda... She is the blonde babe behind the amazing cupcakery Cheery Seed and most recently 'The Forage', Canberra's newest foodie event - bringing together some of the best ACT's food and drinks! Today, she shares with us one of her favourite cupcake recipes and tells us a bit more about how The Forage came about and when the next event is. Thanks B!


Photo  via

I was born in Perth but my family moved east for my father’s work when I was only 3 and Canberra has been my home ever since.  I consider myself as one of Canberra’s biggest fans!  I just adore this city! A natural love of creating, baking and styling is a genetic trait and one that stems back to my Grandmother on my Mother’s side. Her name was Marjorie and I wish she was still here so she could teach me more.


My dreams were always clear as I was growing up - a cosy little shop full of fresh, baked goodness! I only ever thought it would be a dream.  But I kept dreaming (and baking) and after finishing up work to be with my two young children at home, I embarked on a new career path of CUPCAKES!

I started this journey at the Capital Regional Farmer’s Market at Epic every Saturday for 18 months.  The demand grew and so did my urge to have a space to call my own. In 2007, I thought if I don’t do this, I will regret it! So, I opened a little shop called Cherry Seed in the beautiful historical Ginninderra Village and for the next 7 years I had a massive roller coaster ride! Good times, hard times and a huge lesson about the food industry, Canberra and small business.


Anyone that has been in the food industry will know the commitment level you need to sustain to ensure your business is a successful one. I stuck to my commitment and worked hard, but after 7 years, I became tired and so did my little family. There were so many sacrifices and the life/work/balance thing became a bit too hectic. I had ticked all the boxes of my business plan and felt that I had achieved all I wanted to achieve at Cherry Seed. In some sense, I had outgrown my little shop. A big decision was made to shut up shop when our commercial lease came up for renewal at the end of 2013. It was time to move on, dream and achieve again.

Photo  via
At the back of my mind for quite some time sat an idea of a food event for Canberra and its food industry. It was an event that hadn’t been explored in Canberra yet and I was itching to get it started. With the commitment of a shop front, meant I just didn’t have the resources or the energy to get going.
  
With the shop closed, I had a little rest and BAM! The Forage was finally born with the support of some very special people and the Canberra community! The Forage is an event to showcase Canberra’s (and its surrounds) food scene.  Bringing together our cafes, mobile food vendors, wineries, breweries, coffee roasters etc all in one location to offer street style food and drinks. Our first event was held on April 12 in the beautiful NewActon precinct and it was a huge success! We had live music, great quality vendors offering amazing street style food and an atmosphere that will make you want to hang around on a hay bale and fill your belly! Maybe even wash it all down with a mulled wine. It gets bumper to bumper and you may find your toes get trodden on, but it is well worth it!

Photo  via

You can get amongst it at our winter event on July 5 in NewActon from 3pm-7pm. There will be warmth in the Nishi Gallery, amongst the John Avery Gardens and down Kendall Lane. Live music, a brilliant line up of food vendors and the Hustle&Scout Fashion Market across the road in the Nishi Building. You won’t want to miss it! You can visit our website or join us on our Facebook page to stay up to date with what’s happening!

Photo via

My heart will always naturally lean to baking, it makes me feel good.  Time in the kitchen is therapeutic for me and I love the end result of baking! I often lean toward full bodied, fruit based cakes smothered in cream cheese icing!  My favourites would have to be Carrot Cake, Lumberjack or the sweetness of a beautiful Hummingbird. 

One of the top selling cupcakes at Cherry Seed was our Hummingbird cupcakes.  The recipe is simple but the flavours are unforgettable.  Have a go, you’ll want to put the kettle on and enjoy these with a hot cup of tea in your favourite tea cup!

Hummingbird Cupcakes – makes 24

2 cups of plain flour
1 cup of self-raising flour
1 ¾ cup of brown sugar
1 cup of desiccated coconut
1 teaspoon of cinnamon
1 teaspoon of ginger 
1 teaspoon of bi-carb soda
2 cans of crushed pineapple – 1 can drained of its juice
2 cups of very, very ripe mashed banana
4 eggs
1 ½ cups of light olive oil

Pre-heat the oven to 180. Combine all the dry ingredients in a large mixing bowl and mix well. Add all the wet ingredients and mix through, avoiding over mixing. Divide the mixture amongst 24 cupcake cases, filling to about ¾ full.  Bake in the oven for 25 minutes or until firm and golden in colour.  I always turn my cupcake trays halfway through baking to ensure the cupcakes bake evenly. Remove from the oven and take the cupcakes straight out of the pans and place on a cooling rack.  If you don’t do this straight away moisture will build up and the cupcake cases will pull away from the cake.  Cool and then ice with cream cheese icing and a sprinkle of toasted shredded coconut.

Cream Cheese Icing
250g cream cheese icing
1 teaspoon good quality vanilla extract
125 grams softened unsalted butter
3 cups of icing mixture


Put all the ingredients in an electric mixer, beat until a smooth and creamy.  Ice away and enjoy!

Wednesday, 21 May 2014

Guest Post : Chocolate Lace Technique by Ish

If you were at our May cakeup or saw the photos from that event, you would've also seen a particularly impressive looking cake with an intricate chocolate lace border around the length of the cake. At the event and after the event we had so many people wowed by this technique and wanting to know how it's done. So we thought we'd go straight to the source.

Some of you may be already familiar with the lady who created this masterpiece. Ish, has already done a guest post for us once where she shared with us her love for cake decorating and showed us some of her wonderful creations. So this time around Ish has been kind enough to share her chocolate lace technique with us via a video tutorial. She makes it look so easy but I think we can all agree that she is one talented cake decorater! 

On the topic of sharing her skills, Ish is considering running cake decorating workshops in the near future in collaboration with us. If that sounds like something you might be interested in taking part in either comment here or send us an email (canberracakeclub@gmail.com) letting us know that you are interested and also if there are any particular skills or techniques you would like to learn. We will be in touch with more details in the near future so watch this space...

But for now, over to Ish...


Don’t you love it when you do something so simple yet it looks so complicated? Well, chocolate lace is one of those things.

I know it looks very intricate, but I promise, it isn’t as hard as it looks. If you’re not an expert at getting buttercream perfectly smooth, this is perfect. It can honestly transform the most average looking cake into a masterpiece. This is what you will need:

Melted chocolate (I use Cadbury dark chocolate chips, melted over a double boiler)
Piping bag fitted with a small round nozzle
Baking paper
Ruler
Pencil

Rather than explaining how to do it, here’s my short video tutorial showing you how…


Thursday, 15 May 2014

Guest Post: Linda's Salted Caramel and Vanilla Cheesecake

Today's guest post features Linda, a lover of food but a hater of caterpillars (maybe you can tell us about that another time huh)? Recently welcomed to the blogging world, she is the mind behind You Berra believe it, a blog mainly focussed on reviewing good food in Canberra - of course you say, she is a lover of food! She is absolutely great at talking about the food she has eaten and is even better at getting people to talk about the food she has cooked! As you may have seen from our May Cakeup roundup, her decadent salted caramel cheesecake appeared on the buffet and was literally gone in minutes - it was just divine! Linda has decided to share the recipe with us today - lucky us!


I’m not sure where I got my love of baking from. It certainly wasn’t from my mum. Most of her creations (even sweet ones) originated from her wok. Our family oven lay dormant for many years until I started experimenting with baking myself.

I never had much of sweet tooth as a child (that developed a little later in life) but I became accustomed to baking for other people because the enjoyment of seeing the glee on people’s faces far outweighed the work that went into baking. In fact, to me baking doesn’t equate to any work. I find it rather therapeutic. Some of my old colleagues would always know when I was either stressed or upset. Perhaps the promise of a consistent (and delicious) result was cathartic.

Particularly new to my baking repertoire was cheesecake. I know this sometimes strikes fear into the most experienced bakers but cheesecake is quite simple and easy if not just slightly time consuming. There’s nothing like the sweet and savoury taste and smooth creamy texture of a baked cheesecake.

This recipe for a salted caramel and vanilla cheesecake is easier than it sounds. It was originally a Donna Hay recipe (that I’ve modified) and some of you may remember it from its appearance at the last Canberra cake up.

The important thing to remember about this recipe:
  • Do everything in the right order – for a smooth consistency follow the instructions for blending the ingredients into the cheese mixture to a T.
  • There is plenty of waiting time between the steps. So while the work maybe only equate to about 20-30 mins worth all up, the waiting time easily extends the cake making process to about half the day.
  • Make sure the sea salt flakes are sprinkled on once the caramel has cooled as this ensures the salt crystals stay intact and you will get a nice burst of saltiness!


Salted caramel and vanilla cheesecake

Ingredients:

·         400g plain sweet shortbread biscuits
·         ½ cup (60g) almond meal (ground almonds)
·         110g butter, melted
·         350g ricotta
·         500g cream cheese
·         1 cup (175g) brown sugar
·         4 eggs
·         2 tablespoons golden syrup
·         ¼ teaspoon table salt
·         1 teaspoon vanilla extract

Caramel sauce
·         1 cup (250ml) single (pouring) cream
·         35g butter, chopped
·         1 cup (175g) brown sugar
·         sea salt flakes, for sprinkling

To make the caramel sauce, place the cream, butter and sugar in a saucepan over low heat and stir until the sugar is dissolved. Increase heat to high, bring to the boil and cook for 5–7 minutes or until thickened. Set aside and allow to cool. Sprinkle in sea salt flakes and mix into the caramel.

Place the biscuits and almond meal in the bowl of a food processor and process until coarsely chopped. Add the butter and process to combine. Press the biscuit mixture into the base and sides of a lightly greased 22cm springform cake tin lined with non-stick baking paper. Ensure the crust isn’t too thick around the bottom edge. Refrigerate for 1 hour.

Preheat oven to 160°C (325°F). Place the ricotta and cream cheese in the bowl of an electric mixer and beat for 5–6 minutes or until smooth. Add the sugar and beat for 3–4 minutes or until combined. Add the eggs one at a time, beating well after each addition. Add the golden syrup, table salt and the teaspoon of vanilla and beat until well combined. Spoon the mixture into the biscuit shell. Bake for 1 hour 30 minutes or until firm to the touch.

Remove cheesecake from the oven and allow to cool in the tin. Refrigerate for 3 hours or until set. Drizzle with the caramel sauce to serve. Serves 8–10.


Wednesday, 30 April 2014

Guest Post: Bec from Sweet Tea

If you have had the chance to meet Bec, you will know she is the sweetest person ever - and is the most suited person to start up a high tea hire business called Sweet Tea. We were lucky enough to have her come along to our March Cake Up and offer our bakers the opportunity to display their tasty creations on some beautiful Sweet Tea crockery. Bec did an amazing job of decorating our venue, with some gorgeous silky tablecloths, cake stands of all colours and sizes and some beautiful flowers. You would have already had a glimpse of how pretty our March Cakeup looked, and today you'll have a chance to hear from Bec herself! Thanks again to Bec and Sweet Tea for coming along, your props were certainly a much appreciated addition!


My first love is my family, closely followed by a deliciously cosy cup of tea and then scrumptious cakes of all sorts would be a very tight third. If I am able to sample each of these most days life is good!!!

In creating my perfect world family and tea are an easy daily interaction. Waking to the dogs scratching at the door to be let in and fed, a gurgling baby waiting, not very patiently, to be freed from his cot and a husband who is way too happy in the morning trying to cox me into an quick morning run. I’m ashamed to admit that the lovely pot of brewing tea often wins over the not always appealing early morning exercise ;)


I have always been a tea person, though coffee has definitely creeped in since having a baby. Starting Sweet Tea, a high tea hire business, has allowed me to share my love for tea by offering anyone and everyone the opportunity to host a high tea in the comfort of their home or chosen venue. From weddings to baby showers to corporate events or even Canberra Cake Ups, Sweet Tea will add a touch of timeless pleasure to any occasion. That’s my one and only shameless plug I promise. 

Being a lover of tea it is only sensible that I also looove cake, which is not always accessible but constantly craved. I am a keen baker, bowl licker and taste tester, and am often inspired by the mouth-watering images posted on Instagram and Facebook. On one particular Instagram trawling session, I hit the jackpot when I came across the Canberra Cake Club. Having a reputation of all things delicious, I had heard of these increasingly popular Cake Ups and was intrigued. I also wondered what would happen if you added Sweet Tea to a Cake Up, something brilliant of course!


When Rachi and Giulia, from the Canberra Cake Club invited me and my Sweet Tea crockery to their March Cake Up I was more than enthusiastic. Not only was the March Cake Up set in the charming Mint Garden Bar, the theme for the Month was cocktail inspired and the cakes were certain to be wonderfully creative and awesomely YUM. 

After a morning of Cake Up prep, ensue empty stomach, I arrived early to set up my Sweet Tea settings. It was not long after that the Cake Up cooks started to stream in closely followed by the lucky Cake Up eaters and their prised cake forks. Within no time at all the once empty tiered and pedestal stands were brimming with delectable treats and following a lovely welcome by Rachi and Giulia, the cue to eat was given. 


Being a Cake Up virgin I may have gone out to hard to fast, inhaling a luscious espresso martini, devouring a fruit tingle cup cake, then slowing down considerably for a slice of amaretto sour cake, on which having the final bite I needed a rest. However there were so many more cakes to try and the fact that my eyes are considerably larger than my stomach this short break did not last long.

My first Cake Up experience was one of complete bliss, all in all a great afternoon spent talking about cake, eating cake and finally dreaming about cake. I met some great fellow cake lovers, got some must try recipes and finished the day deliriously high on sugar.

Note to self for next time, bring Tupperware for a doggy bag. This way you don’t have to roll out of the venue, instead opting to continue your Cake Up experience at home with a lovely cup of tea.

My three loves in life are now covered, at least hopefully on a monthly basis, hint hint!!!


Thanks Rachi and Giulia for having me, I had a great time and I hope you enjoyed the addition of Sweet Tea. 

Saturday, 12 April 2014

Guest Post: Amy's Limoncello Cupcakes

Our guest poster of the week is Amy, a now regular at our cakeups! She always brings much colour to, as proved by these colourful Limoncello cupcakes which she brought along to our last cakeup. A baker extraordinaire - we asked her to tell us about her experience of Cake Club and of course to share with all of you lovely readers - the recipe for her cocktailish delights which were enjoyed by all!

A huge thank you to the divine ladies of the Canberra Cake Club for inviting me to guest post and share this recipe!


I have always loved to bake, and some of my very happiest memories are connected to being in the kitchen. I spent a lot of my childhood with my great-grandmother, and it was she who instilled my love of cooking. Many afternoons were spent in her company, wrapped in an oversized apron, baking scones, icing patty cakes, and learning the secrets of her famous banana cake.

Nan had a seemingly endless stream of visitors dropping in to her flat for a cup of tea and chat, and they never went hungry! From her I learned the generosity and joy of feeding your friends and family something homemade and delicious. It’s a tradition I continue with my friends now.

I first learned about the Canberra Cake club through the blog posts of committee members Rachi and Giulia. After seeing the pictures of the January cakeup and reading the premise of cake club I knew this was the club for me!

I couldn’t think of a better opportunity to meet some of my favorite Canberra food bloggers, make some new friends and talk all things baking, cake, and food with other passionate Canberrans.

I gleefully attended the February Cakeup hosted by the delightful ladies of the Essential Ingredient. What a veritable feast of cake! The table was laden with amazing creations and the room was buzzing with chatter about all the “Secret Ingredients”. I spent most of the afternoon in a glorious sugar haze, munching my way through cake and chatting with the other lovely cakeup participants. I was hooked.

What I love about the Cake Club is that it is so friendly, positive and there is no judgment of your creation; everybody is just there because they love cake! The bakers I’ve met at cakeups include novices who confess that they don’t bake much and had to borrow the equipment to bake their creation, to professional bakers who make a livelihood from their baking.

The cakes have been old family recipes, amazing multi-layered creations, rustic cupcakes, MKR contestants impossi-balls masterpieces and even cakes shaped like the Cake Club logo! And every one of them has tasted amazing! Cake Club is fantastic for the people it brings together; it’s so lovely when someone tells you they really enjoyed your cake, or you swap a recipe or get to pick the brains of a really talented baker.

The March Cakeup was another chance to eat some truly delicious cake and chat with some lovely people. Set in the beautiful Mint Garden Bar on a gorgeous warm Autumn day, vintage cake stands and vases full of flowers were a heavenly backdrop for the awesome “cocktail” creations.

For the March cocktail theme I had decided on something simple and citrus; Limoncello Cupcakes. I’m not ashamed to say I adore these cupcakes! They are dense, yet fluffy and moist at the same time and the lemon has a lovely tang without being overpowering. There were none left at the end of the Cakeup so I guess that’s a good sign!

I did have a small frosting disaster the morning of the Cakeup (Note, it’s never a good idea to try an experimental frosting recipe the day of the cakeup without a back-up plan!) so the frosting on my cupcakes, while delicious, was quite thin and wasn’t capable of holding its shape for piping.  If you follow the recipe below though (which I didn’t) you will get a lovely thick cream cheese frosting that you can pipe easily.


Limoncello Cupcakes 
(From Bake it with Booze: http://www.bakeitwithbooze.com/)  
Oven temp: 350
Yield: About 18.
For the cupcakes:
•        2 eggs 
•        115grms  softened butter
•        1 cup yogurt (I used full fat Greek style.)
•        1 cup caster sugar
•        1/4 cup lemon juice
•        1/4 cup limoncello
•        1 tbsp vanilla extract
•        zest from 1.5 lemons
•        1 tsp baking powder
•        1/4 tsp salt
•        1.5 cups flour
•        1 tsp baking soda 
•        1/2 tsp cream of tartar

For the frosting:
**Note: this will make enough frosting for around 24 cupcakes, so there will be some leftover ( I may or may not eat this with a spoon....)
•        250grms  cream cheese
•        100grms  butter
•        zest from the remaining  ½  lemon
•        1 Tbsp limoncello
•        1 tsp vanilla bean paste or vanilla extract
•        3 cups icing sugar

Cupcakes

1. Mix the softened butter on med-high until fluffy, then mix in the yogurt and sugar until light and creamy. Mix in the two eggs.

2. Now, add the vanilla, lemon juice, limoncello, and lemon zest. Mix on med speed. (Don’t panic if your beautiful creamy mixture turns into a curdled mess at this stage, its normal)

3. With the mixer on low speed, slowly add the dry ingredients. It's a good idea to stop and scrape the sides of the bowl every now and then so you don't end up with pockets of baking soda.

4. You'll end up with a very thick, but fluffy, batter. Prepare your muffin tin with cupcake liners, and spoon in the batter. I filled mine pretty full, and ended up with enough mixture for around 18 cupcakes.
Bake at  170 degrees for 18-20 minutes, depending on your oven.

For the frosting:

1. The butter and cream cheese should both be at room temperature. Beat them both together until you have a fluffy and homogeneous mixture, with no visible lumps of butter.

2.  Add the vanilla bean paste, limoncello, and lemon zest. Beat again until fully incorporated. Then, with the mixer on low speed, gradually add the sifted icing sugar. Scrape the sides of the bowl, then mix on med-high for about 30 seconds.

Once the cupcakes are completely cooled, cover generously with your frosting.